Tampilkan postingan dengan label Labels. Tampilkan semua postingan

Attractive Cloud Label Widget for Blogger

attractive-cloud-label-widget-for-blogger
We can change our blog performances as we want like changing blogger template, customizing label widget, modifying blog content width etc.  Although some bloggers do not care about blog design & its user friendliness. We all like to maintain our blog beautifully, also readers would like to visit an attractive site, if they didn't meet such sites, and they will definitely close the window directly. After few weeks ago I rendered you attractive CSS cloud label style for your blog. This time after learning new things, I coded new cloud label style and added it to my blog.It looked like good. So i thought to present  this cloud label style to my readers.


What are new features on this Cloud label style?


You might meet some new items on this cloud label style, if you used it. Some of them are listed in below.

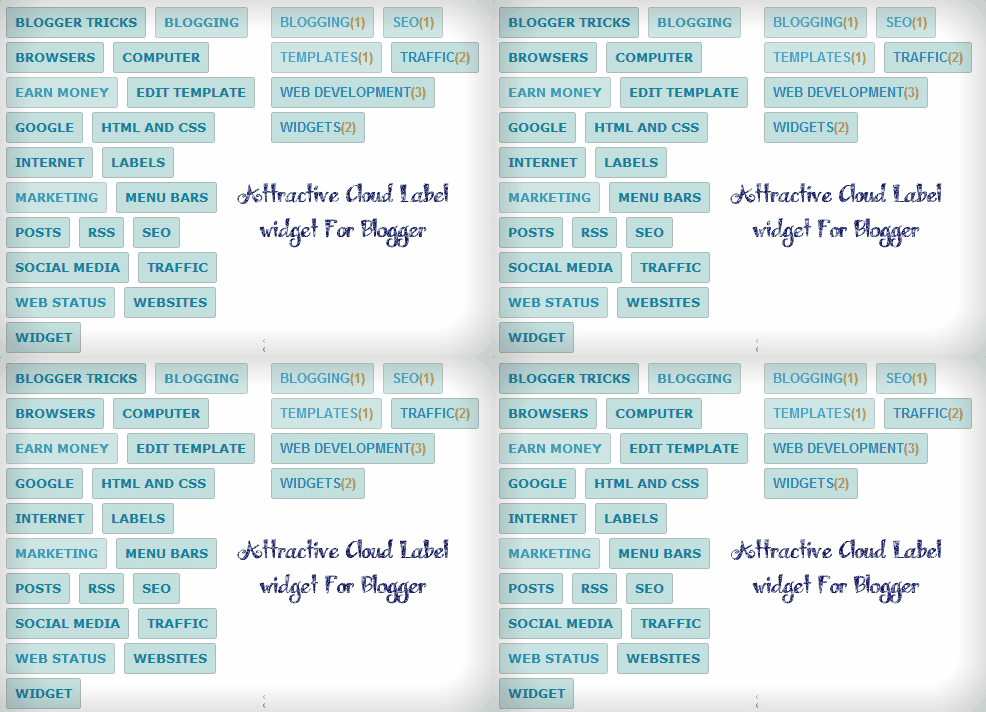
I. Define different colors for label name and label post counter( see image )
II. When mouse over on label name, it changes its preferences and on mouse out, it revert itself. But post counter does not render any hovering effect, because it is not a hyperlink.
III. Next and my best feature is, it does not change its background color and approach to an ugly design. When any person find posts under a special label, lets tell it is ‘Widgets’, he/she will see the visited link (Widget label link) in another design.

Demo: - Look below stylish cloud label style. You can see how it will appear with post counter and without.

Stylish-cloud-label-style-with-post-counter-and-without-it


How is works?

Each label link is nested in a class name called “label-size”. If font-size, link color, hovering effects are not specified, they will change to default post styles. So defining each class name in label gadget, we can make a beautiful cloud label style.

Install cloud Label Widget on Blogger


First of all you have to install cloud label style on your blogger blog, if you have done, make sure you convert block labels into cloud label style.

Step 1: Sign in to your Blogger account.
Step 2: Go to Dashboard >> Layout >> Add a Gadget.

Add-a-Gadget-link


Step 3: Now click on “Labels” page element from pop up window.

Labels-page-element


Step 4: Then turn display style to “Cloud” as shown below. Please select as most 25-30 labels(Selected Labels). If blogger let you to add 2000 labels to a blog, you can’t display such amount of label links on your blog. Too many labels on your blog will look awkward.

Configure-Labels-Cloud-Label-display-mode


Step 5: Save your “Labels” page element.

Integrate new cloud Label style to Blogger


Now you just need to do is pasting some piece of CSS code to your template. Let’s see how to do it.

Step 1: Go to ‘Template’ and backup your template.
Step 2: Now click on ‘Edit HTML’ button and find below code in your template.

]]></b:skin>

Step 3: Just above of ]]></b:skin> code, paste below piece of code directly.


.label-size {
margin:2px 6px 2px 3px;
padding:7px 8px;
text-decoration:none;
text-transform:uppercase;
float:left;
border:1px solid #AEBABA;
-moz-border-radius:2px;
-webkit-border-radius:2px;
border-radius:2px;
font-weight:bold;
font-style:normal;
color:#B7831B;
background:rgba(180,215,214,0.80);
font-size:13px;
}
.label-size:hover {
border:1px dotted #AEBABA;
-moz-box-shadow:inset 0 0 2px 2px rgba(189,225,224,0.35);
-webkit-box-shadow:inset 0 0 2px 2px rgba(189,225,224,0.35);
box-shadow:inset 0 0 2px 2px rgba(189,225,224,0.35);
text-decoration:underline;
-moz-transition:all 1000ms linear 150ms;
-webkit-transition:all 1000ms linear 150ms;
-ms-transition:all 1000ms linear 150ms;
-o-transition:all 1000ms linear 150ms;
transition:all 1000ms linear 150ms;
}
.label-size a {
text-decoration:none;
float:left;
text-transform:uppercase;
-moz-transition:all 1750ms ease-out 15ms;
-webkit-transition:all 1750ms ease-out 15ms;
-o-transition:all 1750ms ease-out 15ms;
-ms-transition:all 1750ms ease-out 15ms;
transition:all 1750ms ease-out 15ms;
}
.label-size a:hover {
color:#FCC442;
text-decoration:underline;
-moz-transition:color 1s ease,text-decoration 1.5s cubic-beizer;
-webkit-transition:color 1s ease,text-decoration 1.5s cubic-beizer;
-o-transition:color 1s ease,text-decoration 1.5s cubic-beizer;
-ms-transition:color 1s ease,text-decoration 1.5s cubic-beizer;
transition:color 1s ease,text-decoration 1.5s cubic-beizer;
}


  • Change 13px with font size that suit for your template.
  • Replace 7px 8px with your lengths which specify the height and width of label link box.


Step 4:  Last Save your Template.

You’re done. Now view your template and see how label widget is hanging in your blog beautifully.


Need help…?

Friends, I present this tutorial as simple as you can understand. If you meet any error or can’t understand how to implement this cloud label style, just leave a comment in below.

How to Display Post counter in Label as Title

Display-Number-of-Posts-as-Title
We use Labels or tags to categorize posts.Adding labels to posts is quite simple in blogger.When time is going,your blog might have many posts under each labels.You can show how many posts are including in each label by using Label post counter.But if you see it looks like label counter making your site ugly,then you have to remove the label post counter from your labels.This is mostly happening in templates that has cloud label style label gadget.In a past post i explained you how you can display label names as the title of label links.So in this tutorial, I use that method for showing the number of posts under each label on label gadget.

1: Sign in to your Blogger account.
2: Go to Dashboard >> Template and back up your current template.
3: Then Click on "Edit HTML" button and find below code on Template editor.

 <b:loop values='data:labels' var='label'>

You will see piece of code appearing followed by above code slightly similar to one below..

<b:loop values='data:labels' var='label'>
        <li>
          <b:if cond='data:blog.url == data:label.url'>
            <span expr:dir='data:blog.languageDirection'><data:label.name/></span>
          <b:else/>
            <a expr:dir='data:blog.languageDirection'  expr:href='data:label.url'><data:label.name/></a>
          </b:if>
          <b:if cond='data:showFreqNumbers'>
            <span dir='ltr'>(<data:label.count/>)</span>
          </b:if>
        </li>
      </b:loop>

4: Remove above code from your template and paste with below code.

<b:loop values='data:labels' var='label'>
        <li>
          <b:if cond='data:blog.url == data:label.url'>
            <span expr:dir='data:blog.languageDirection'><data:label.name/></span>
          <b:else/>
            <a expr:dir='data:blog.languageDirection' expr:title="data:label.count" expr:href='data:label.url' ><data:label.name/></a>
          </b:if>
        </li>
      </b:loop>

5: Now Save your Template.

That's alright.View your blog and hover on a label link of Label gadget.You will see the number of posts appearing nearby the label link.

How to Style Label links and Counter Using CSS

Styled-Label-Links-and-Counter
We can use CSS(Cascading-Style-Sheet) styling language to change the appearances of label links.Blogger accommodates us to edit the template and customize it as we want.So i thought to use CSS for changing the font styles and colors of label links in label widget.You can make this activity very easily if you're a coding dude.Look at the image in left side.I changed the font family style,color and font-size of label name.Also i modified the color of label post counter.If you need to change them as your desire you can do it very easily.So lets start our journey to Blogger for styling label links and counter.


1: Sign in to your Blogger account.
2: Now go to Dashboard >> Template and backup your template first.In case you got any thing wrong,downloaded template is the only one assistance to reinstall your current template.
3: Click on "Edit HTML" button and find below piece of code in your template.

<b:loop values='data:labels' var='label'>

After you found above code,you will see a portion of code appearing followed by above code slightly similar to one below.

<b:loop values='data:labels' var='label'>
        <li>
          <b:if cond='data:blog.url == data:label.url'>
            <span expr:dir='data:blog.languageDirection'><data:label.name/></span>
          <b:else/>
            <a expr:dir='data:blog.languageDirection' expr:title="data:label.name" expr:href='data:label.url'><data:label.name/></a>
          </b:if>
          <b:if cond='data:showFreqNumbers'>
            <span dir='ltr'>(<data:label.count/>)</span>
          </b:if>
        </li>
      </b:loop>

 4: Now Replace above code with below chunk of code.

<b:loop values='data:labels' var='label'>
        <li>
          <b:if cond='data:blog.url == data:label.url'>
            <span expr:dir='data:blog.languageDirection'><data:label.name/></span>
          <b:else/>
            <a expr:dir='data:blog.languageDirection' style="font-size:20px;font-weight:bold;color:green;font-family: 'Brush Script MT', cursive;" expr:title="data:label.name" expr:href='data:label.url'><data:label.name/></a>
          </b:if>
          <b:if cond='data:showFreqNumbers'>
            <span style="color:red;" dir='ltr'>(<data:label.count/>)</span>
          </b:if>
        </li>
      </b:loop>
As i mentioned in above,i just changed some performances of label links.You can add borders,text shadows and further effects using CSS. Add your CSS code in the green color codes.

5: After you made changes,Save your Template.

If you didn't add any own CSS code, Links of label widget will look like above image.

CheckHide Author Name in Blogger Posts

Need Help ?


Want any help to make your own label gadget ? So leave a comment below.I will help you as time allows me :-o

Display Label Name as Title of Label Link in Label Gadget

Label-Name-as-Label-link-title
Displaying the Label name as label title is sometimes useful for readers.If the label name is too long and it is showing as Cloud label display style,showing label name as the title is important.It will make your blog user friendly blog.Here in this tutorial i will help you to display Label name as the title of each label link. You can find more posts under Labels from this link.Now follow below instructions to show the Label name as the title when anyone hover on.


Step 1: Sign in to your blogger account.
Step 2: Now go to Dashboard >>Template and download your current template first.In case you got anything wrong in template,this downloaded template will help you to recover bugs what you made.
Step 3: Then click on "Edit HTML" button and find below code in your template.

<b:loop values='data:labels' var='label'>

After you found above code,you will see a block of code followed by above code slightly similar to one below.

<b:loop values='data:labels' var='label'>
        <li>
          <b:if cond='data:blog.url == data:label.url'>
            <span expr:dir='data:blog.languageDirection'><data:label.name/></span>
          <b:else/>
            <a expr:dir='data:blog.languageDirection' expr:href='data:label.url'><data:label.name/></a>
          </b:if>
          <b:if cond='data:showFreqNumbers'>
            <span dir='ltr'>(<data:label.count/>)</span>
          </b:if>
        </li>
      </b:loop>

 Step 4: Now replace above code with below code.

<b:loop values='data:labels' var='label'>
        <li>
          <b:if cond='data:blog.url == data:label.url'>
            <span expr:dir='data:blog.languageDirection'><data:label.name/></span>
          <b:else/>
            <a expr:dir='data:blog.languageDirection' expr:title="data:label.name" expr:href='data:label.url'><data:label.name/></a>
          </b:if>
          <b:if cond='data:showFreqNumbers'>
            <span dir='ltr'>(<data:label.count/>)</span>
          </b:if>
        </li>
      </b:loop>
Step 5: Save your Template.

You're done.View your blog and hover on a label link in Label gadget.You can see the name of label is appearing as the title of link like above image.

CheckHow to Display Post counter in Label as Title

If you have any question,let me to know by commenting below.Happy blogging buddies :)

How to Add Feed link button Before Labels in Label Gadget

Feed-link-button-Before-Labels-in-Label-GadgetWe use Labels in blogspot blogs to classify posts for our and user convenience.In my last post i explained you how to add feeds for labels.If you missed that tutorial,i suggest you to read it.Because this tutorial is the second part of that tutorial.In this tutorial i add a Feed link button before all labels in Label gadget.Look at image.The process of this task is quite easy.I just added a feed icon that linked to feeds of your site's tags or labels.By clicking on feed link button,user will be concentrated to feeds of label. I'm trying to present this tutorial as easy as i can.If you get any question,let me know below from commenting.Now follow below instructions consecutively for adding feed link in to Label widget on your blog.


Adding Feed Link Button


Note:- Before adding Feed link button,your blog must be added Label widget.Else you can't follow below steps correctly.So make sure you have added Label widget on your blog.

Step 1: Sign in to your Blogger account.
Step 2: Now go to Dashboard >>  Template and download your template first.This will help you to re-install your current template,if you get anything wrong.
Step 3: Click on "Edit HTML" button and find below code on your template.

<b:loop values='data:labels' var='label'>

You will see a block of code followed by above code often similar to below.

<b:loop values='data:labels' var='label'>
        <li>
          <b:if cond='data:blog.url == data:label.url'>
            <span expr:dir='data:blog.languageDirection'><data:label.name/></span>
          <b:else/>
            <a expr:dir='data:blog.languageDirection' expr:href='data:label.url'><data:label.name/></a>
          </b:if>
          <b:if cond='data:showFreqNumbers'>
            <span dir='ltr'>(<data:label.count/>)</span>
          </b:if>
        </li>
      </b:loop>

Step 4: Now replace above code with below code.

<b:loop values='data:labels' var='label'>
<li>
<a expr:href='data:blog.homepageUrl + &quot;feeds/posts/default/-/&quot; + data:label.name'><img alt='Subscribe' src='http://www.feedburner.com/fb/images/pub/feed-icon16x16.png' style='vertical-align:middle;border:0'/></a>
<b:if cond='data:blog.url == data:label.url'>
<span expr:dir='data:blog.languageDirection'><data:label.name/></span>
<b:else/>
<a expr:dir='data:blog.languageDirection' expr:href='data:label.url'><data:label.name/></a>
</b:if>
<span dir='ltr'/>
</li>
</b:loop>

Step 5: Now Save your Template.

 You're done.Refresh your blog and see the feed link button appearing before of label links.Happy blogging pals :)